Integrations Settings
Accessing Integrations Settings
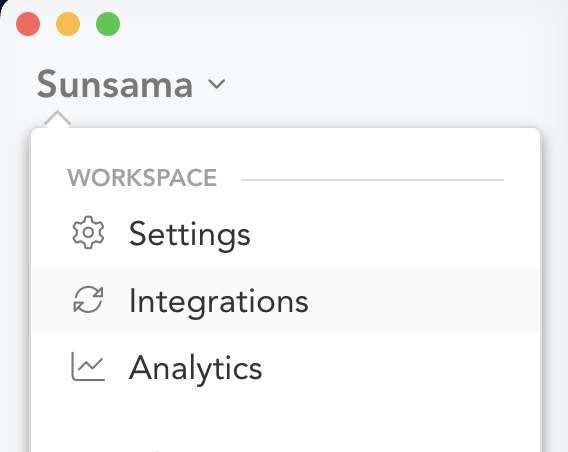
To manage the settings for your calendars and other integrations, navigate to your Integrations settings from the main dropdown menu.

Calendar Settings
For more detailed information on our calendar integration, refer to this page.
Walkthrough
How to use
Disabling a calendar · 0:35
For calendars you don't care about, you can disable them. Disabled calendars won't be visible to you within the app.
Setting a default task calendar · 1:00
When timeboxing your tasks, if you don't want your tasks to be scheduled to your primary calendar by default, you can choose a different calendar to be the default.
This is a good option if you don't want your tasks to clutter up your primary calendar.
Linking a calendar to a channel · 1:26
Each of your calendars can be linked to a specific channel. So you can link your @company.com work calendar to your #work context, and you can link your @gmail.com personal calendar to your #personal context.
Once you've linked a calendar to a channel/context, when you schedule a task in that channel/context to your calendar, it will automatically be scheduled to the linked calendar.
Also, when you import an event from a calendar linked to a channel, the task that's created will automatically be assigned to the linked channel.
Import events · 2:57
When planning your day, if there are specific calendars you regularly want to import events from, you can mark these calendars as import calendars. They'll then be considered during the Daily Planning flow for importing meetings.
You can also configure this and other settings for importing meetings via the Customize Import Rules settings during Daily Planning.
You can also configure Sunsama to automatically import your calendar events to your task list using Auto-sync. Refer to this guide on how to do that.
Email
Custom email client
If you use Superhuman as your email client for your Gmail or Outlook, you can configure this setting so that opening the deep links of your Gmail or Outlook emails open that email in Superhuman instead.
Email forwarding
Find your email forwarding addresses by going to the Email page of your Integrations. You'll find the email forwarding information at the bottom of that page.

For more information, go to this page on the Email Forwarding feature.
Other Integrations
After your Calendar and Email settings, you’ll see all the tools that can integrate with Sunsama.
To view specific information on an integration and how to use it, please visit the respective document in the left hand panel of this help center.
To add one of these integrations, click “add” and proceed through the steps to connect that account. Refer to the pages in this help center specific to the installation and account management for these different tools.
- Learn more: click the "Learn more" button to be taken to the help center guide for that respective integration
- Overview: This will give a brief overview of the integration and its features. will bring you to a page of general information about the integration.
- Manage: Clicking “Manage” will bring you to a page to manage those connected accounts.
- Remove: Clicking “Remove” will remove the connected integration. If you want to add it again, you’ll have to follow the regular flow to add it.
Updated 5 months ago