Setting up your Sunsama account
What to expect when you first sign up for Sunsama
Signing up
Visit https://sunsama.com and click the "Sign Up" button to get started. You’ll then be directed to start your 14-day free trial by logging in with your Google or Outlook account, or by entering in your email and a password.##
Starting your trial
After logging in, you’ll be directed through a one-time onboarding and planning flow unique to a first time user.
The purpose of this guided onboarding flow is to properly set up your workspace and introduce you to the core features of Sunsama. It’s necessary to complete all of these steps to gain access to your Sunsama workspace. You can always change any of the settings you pick later on.
Guided onboarding flow
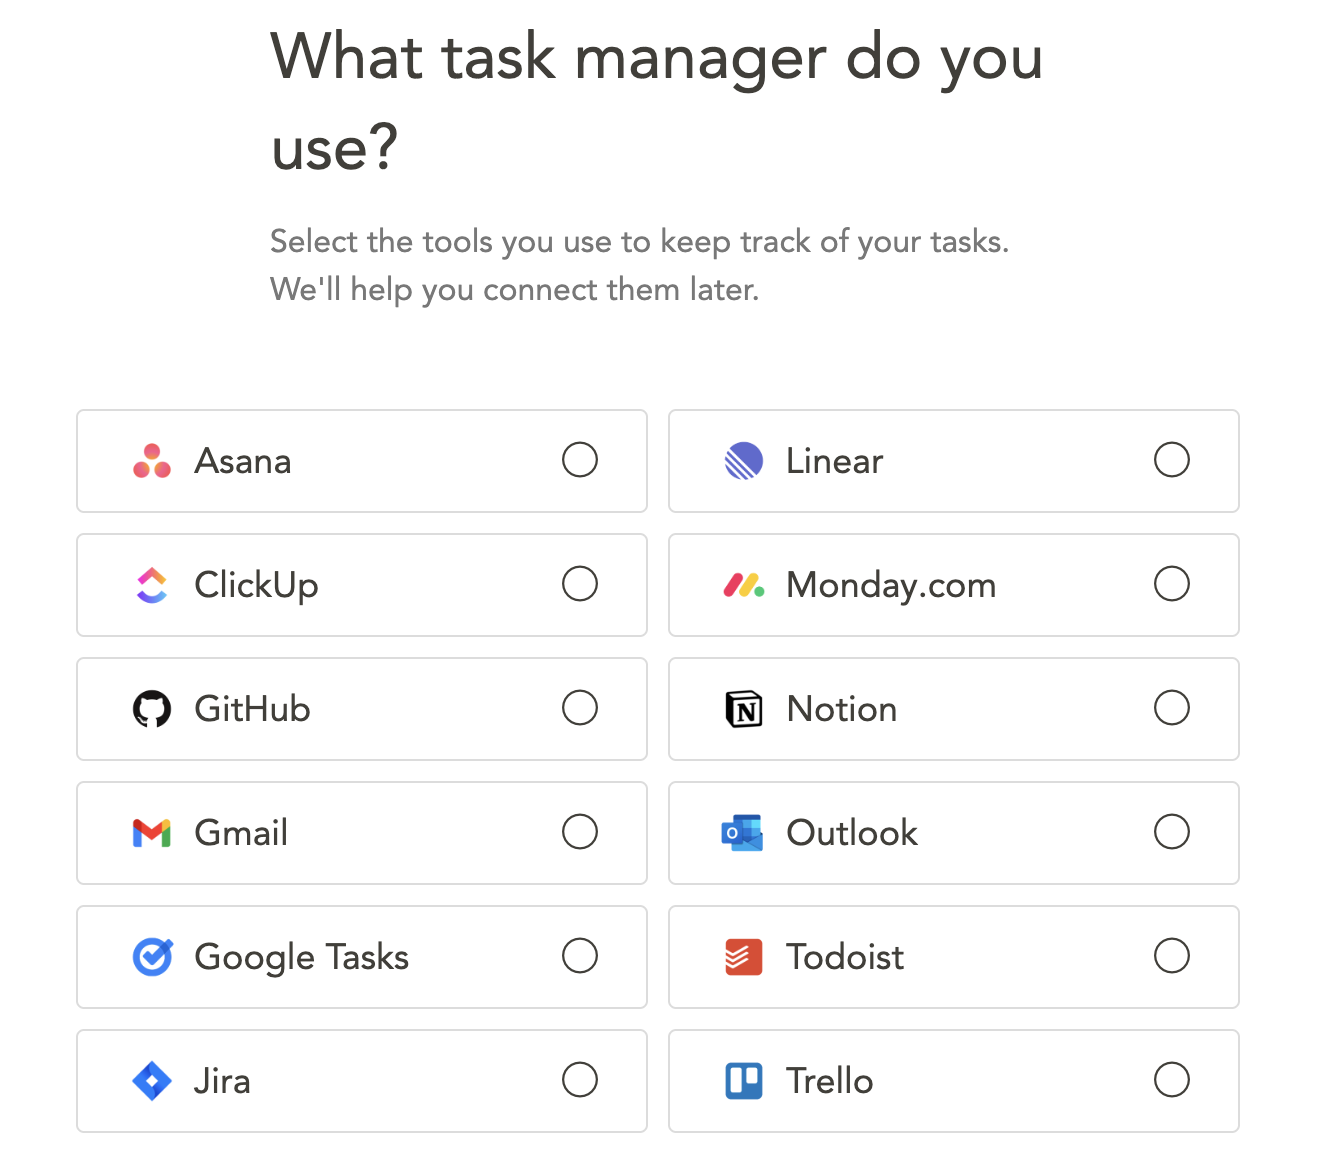
Pick your task management tools
Let Sunsama know what other task management tools you use day-to-day.
First, we’ll ask you which of the integrated tools in Sunsama you use. You will connect your accounts from those tools later on when you plan your first day, and can always add more at another time.
Connecting your calendars:
Link your external calendar accounts.
Next, we’ll ask if you wish to connect a Google, Outlook, and/or iCloud calendar account to Sunsama. This will allow you to see and import meetings and events on those calendars, and optionally timebox your tasks to those calendars.
Sunsama also has its own internal calendar, so you can timebox your tasks without polluting your personal or work calendar if you wish. But you can always configure which tasks end up on which calendars based on channels or by default, giving you complete control over your timeboxing experience.
For more information, go to our page on Calendar Settings.
When do you plan your day?
Pick the time that you want Sunsama to remind you to plan each day.
Sunsama walks you through the process of planning your day everyday. You can tell Sunsama what time to initiate your daily guided planning.
When your planning time arrives, you’ll receive your daily email reminding to plan your day (during your 14-day free trial only), and your Sunsama app will automatically transition to the guided planning flow.
What time you should select:
- If you like to plan your day the morning of, you should pick a time before 3 PM. It’s best to pick a time before you’ll reach your computer.
- If you like to plan your day the night before, you should pick a time after 3 PM. It’s best to pick a time where you’ll be wrapping up for the day, since planning for tomorrow should be the last thing you’ll do that work day.
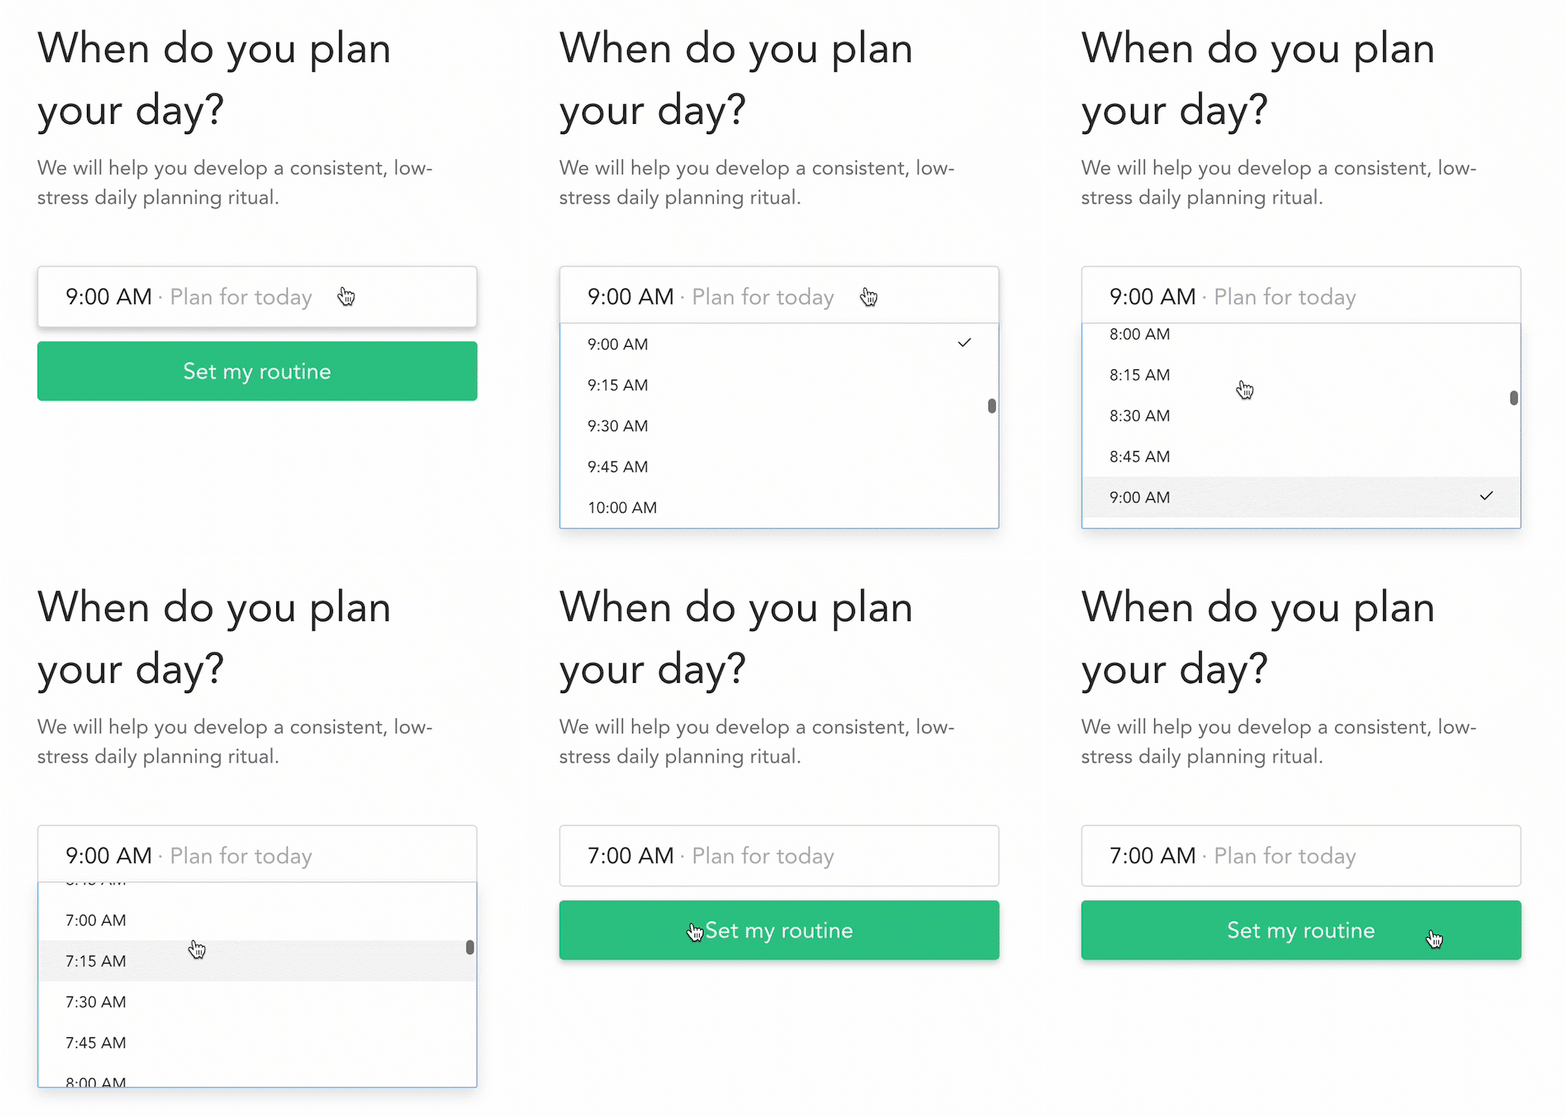
You can change your daily planning time later in your Account Settings.
Guided Daily Planning flow
Next, you’ll go through Sunsama’s guided daily planning process of reflecting on a day and planning a day in Sunsama.
The guided planning flow you’ll see today will be slightly different than a normal daily planning flow. For your first time today, we’ll show you a custom version that’s best suited for you to learn how to use Sunsama and understand the principles of daily planning.
You must to go through all of these first-time planning steps before you can make it to the main Workspace View. Then you’ll have full control over your Sunsama.
In order to proceed past each step, you’ll need to follow the instructions listed in the left hand panel of each step. If you ever get stuck, read those instructions or hit “Next”, “Continue” or “Get Started”.
Track your progress in this special guided planning flow at the top bar:
Walkthrough
Please watch the video below for a walkthrough of this part of account set up.
Plan today or tomorrow · 0:00
First, select if you'd like to build your task list and plan your day for Today or Tomorrow. If it's the afternoon or nearing the end of your day, select "Plan Tomorrow". Otherwise, "Plan Today".
Adding tasks for today · 0:31
Next, we’ll walk you through a daily planning flow for the first time. You’ll begin by clicking the "Add task" button and typing in tasks you want to work on today. You can create multiple tasks on this stage.
Click “Next” to advance.
Sunsama is designed to help you focused on your most essential tasks for just today. You should think of this list as all the things you need to get done today.
Today's task list isn’t a place to add all the tasks you want to do someday. For tasks that don’t yet have a date associated with them, you can use the backlog.
Time estimates · 1:42
Add time estimates, or "planned times" to each of your tasks. Try your best to think how long each task will take to complete today.
It’s important to add time estimates to each task, that way you’ll get a more realistic picture of whether what you are trying to today is actually feasible.
As you add planned times, you'll see the Total Planned Time for the day add up. You'll be warned against planning too much work, which compares your planned time against your workload threshold, which you can configure in your settings later.
Fill in tasks from other tools · 2:58
This next step allows you to add tasks from your other integrated tools.
Connect your calendar if you have not already, so you can see and import your meetings and other calendar events to your task list.
Automatic meeting importLater, in your settings, you can configure Sunsama to automatically import just the relevant meetings and events from your calendars, so you don't need to automatically import them.
You can import to dos from other tools as well. Click on the + button in the right hand panel to reveal the integrations you can set up and import from. You will have to connect your respective accounts first. Then, simply drag an item from that integrated tool into today’s column. Click “Next” to advance.
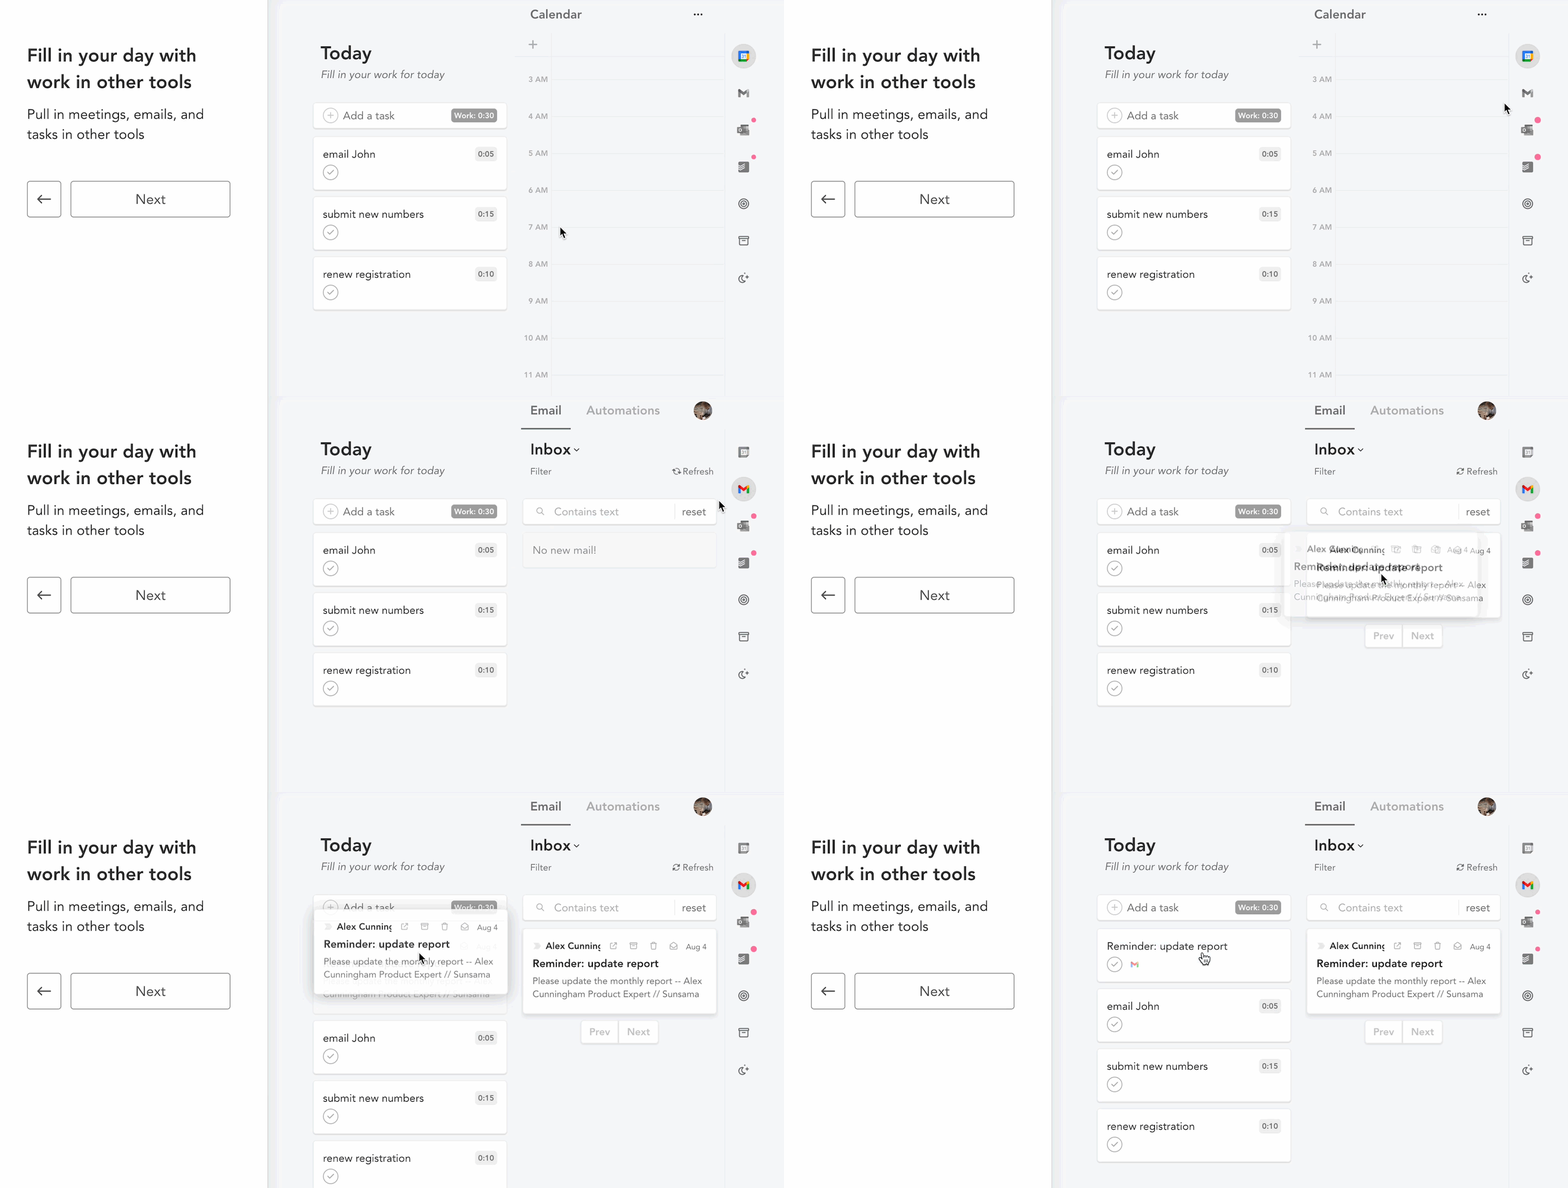
Sunsama’s integrations allow you to create tasks from items in your other connected tools, such as emails. This way, you don’t have to remember to check your other tools throughout the day, or create new tasks that simply reference another tool. You can create tasks from those very tools and include the content and notes therein. Tasks created from integrations will also have links back to those tools, so you can quickly navigate back to them. Additionally, the integrations have built-in automations that you can set up, so that upon importing or completing a task, that item is updated according to your preferences back in its respective tool.
For more information, please refer to the various guides on our integrations in this help center.
Push back non-essential tasks · 4:43
In this step, you can easily bump back tasks you won’t be able to work on today. Simply drag a task to the Tomorrow or Next Week column. Click “Next” to advance. More info on this stage here.
If you want to move a task to a day that’s not shown here, you can do that by clicking the calendar icon on the task card and selecting any day.
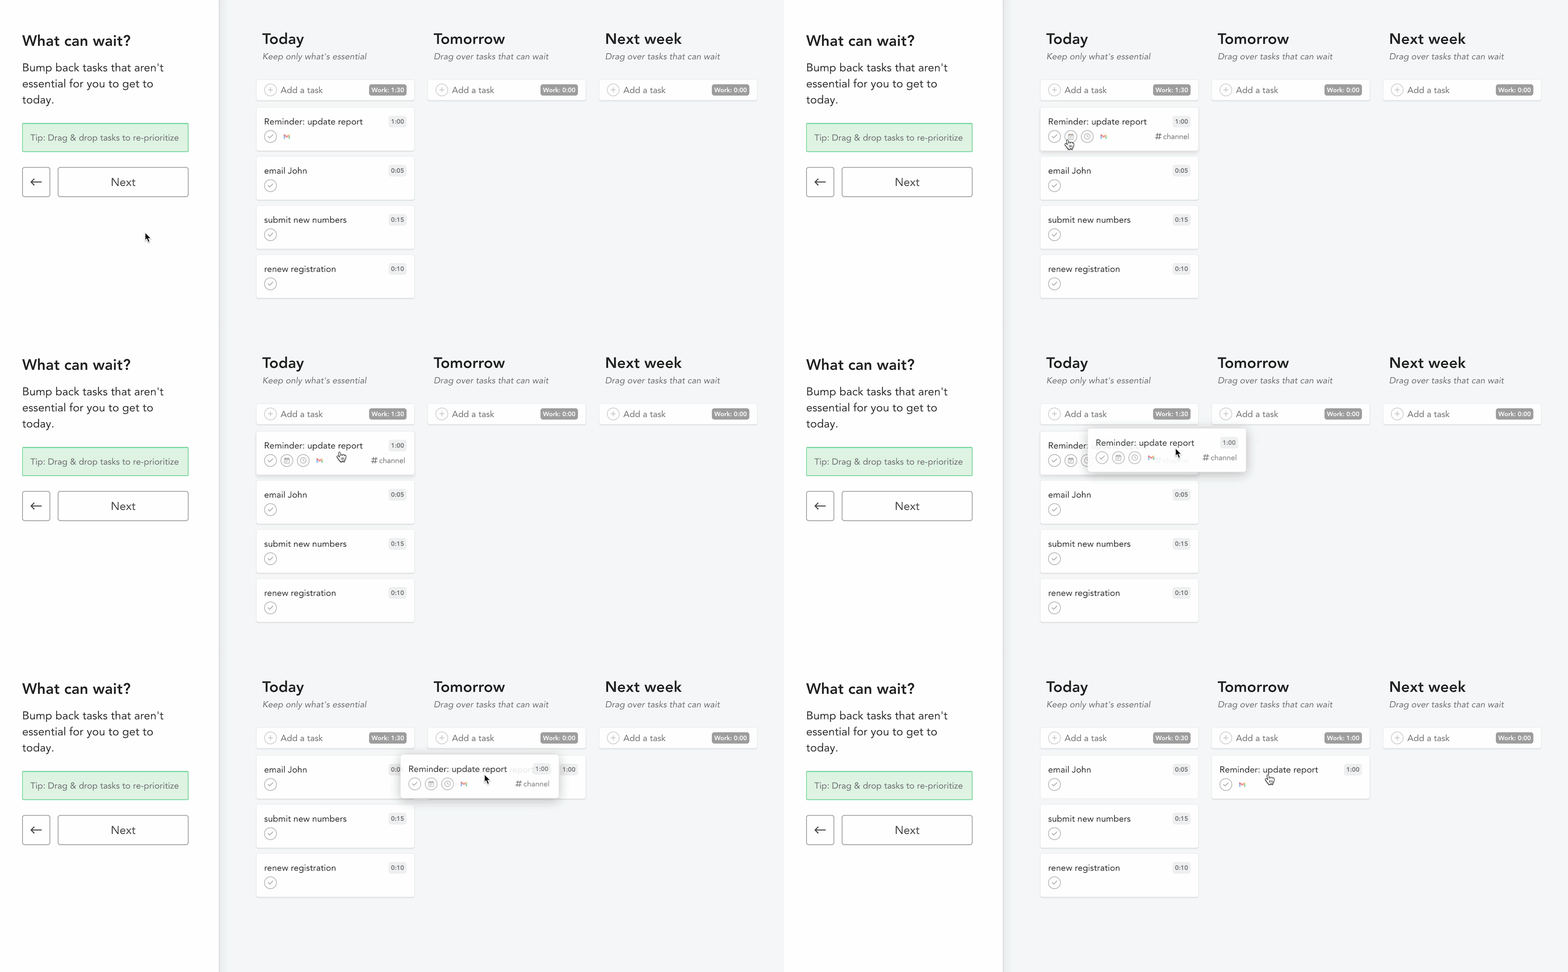
Sunsama will help ensure that you aren’t trying to do more work than is reasonable. Later on, you can set up your workload threshold so Sunsama knows how much time you should be working each day. Sunsama will softly caution you if you have planned too much work for the day or if you’re overcommitted, according to your settings. In order for this to work well, you should always add time estimates to your tasks no matter how big or small they are, and make sure to import all your meetings into your task list. If your tasks are lacking time estimates, Sunsama will warn you of an unpredictable workload.
Finalize your plan · 5:46
Use this step to reorder the list of your tasks for today in the order you wish to work on them.
If you want to get a better idea of when you’ll work on things relative to the other meetings and obligations on your calendar, you can timebox the task. Timebox tasks by dragging and dropping them onto the calendar, or by hovering over a task and hitting the keyboard shortcut X to autoschedule it.
Once you’ve ordered your task list, set your Shutdown time. This is the time when Sunsama will prompt you to shutdown for the day.
You can snooze or dismiss the shutdown prompt when it arrives at the scheduled time.
Click “Looks good” to advance.
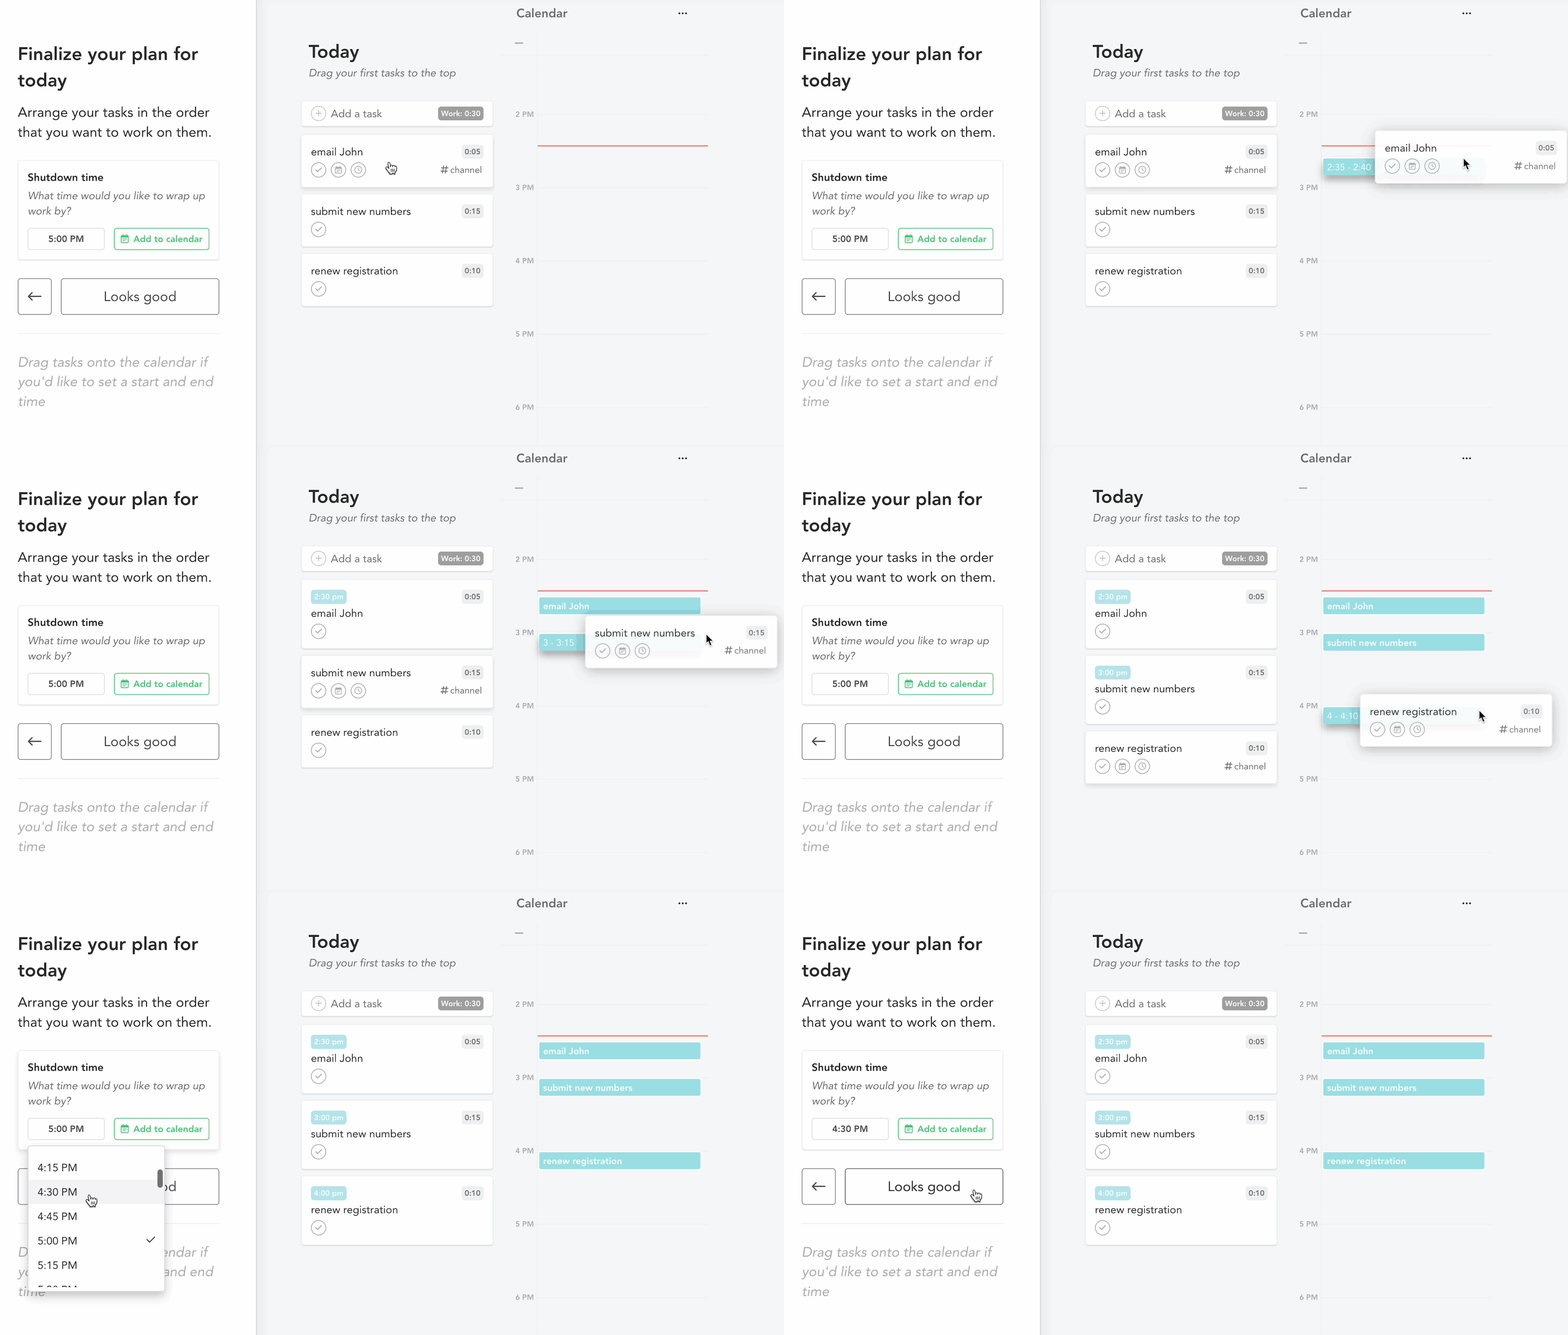
When you timebox your tasks, you’re creating calendar events from those tasks. You’ll be able to control what calendar these events are created on, the privacy of these events, and other settings later on.
If you use the auto-schedule feature to timebox your tasks, Sunsama will place the tasks on the calendar for you, according to your schedule settings and around existing events on the calendar.
Share your plan and Get Started · 7:07
In the final stage of daily planning, you’ll see a list of your tasks for the day in front of you. Take a moment to jot down any obstacles you may anticipate facing. Optionally: share your plan to a connected Slack or Microsoft Teams channel.
Finally, click “Get Started” to complete the planning flow.
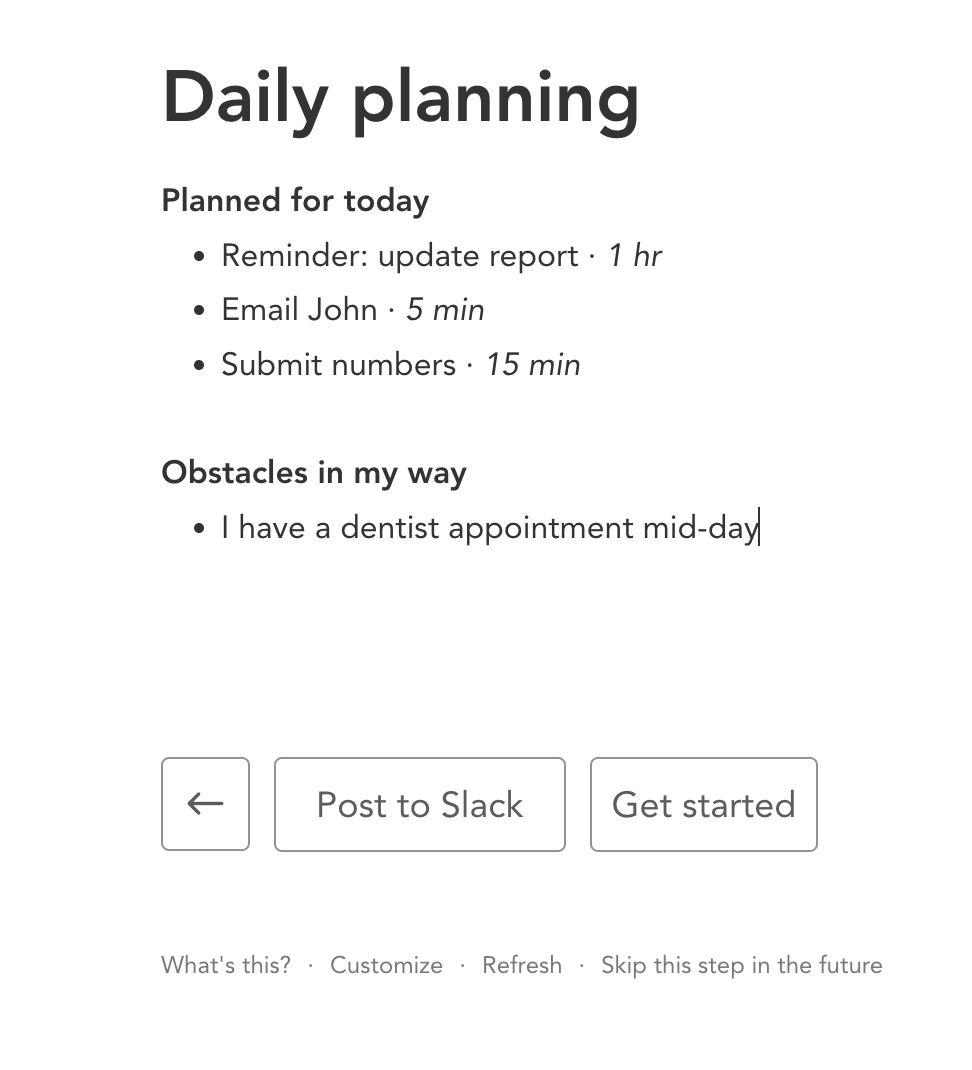
When you arrive on this page, you'll see an auto-generated summary of the plan you just created in the main text editor. You can directly edit the displayed text, or click “Customize” to change what’s automatically generated in your list.
Optionally: connect your Slack or Teams account so you can post this for your colleagues to see.
If you don't have teammates to share your summary with, or you don't care to jot down obstacles or other notes here, you can click the "Skip this step in the future" option at the bottom to forever skip this step as part of daily planning.
The purpose of this step is two-fold. Firstly, for you to take in your plan for the day one last time and note to yourself what the day holds and what stands in your way. Secondly, if you use Sunsama with a team and use Slack, you can share this plan to your colleagues so they’re aware of what you’ll be working on today.
Workspace View · 8:02
Once you’ve completed the first time guided daily planning, you’ll arrive at the main workspace view of Sunsama with your Daily Kanban. , You can otherwise now use Sunsama as you wish, and can manage your tasks, explore your various settings, and set up your integrated tools.
You’ll go through the guided daily planning flow at your next scheduled daily planning for the next two days.
"Setup Sunsama" taskSunsama will create a "Setup Sunsama" task in your task list. Click on the task to open it. You'll see some initial prompts in the form of subtasks to help you set up a few pieces of your Sunsama workspace, as well as information and helpful links in the notes section of that task.
Onboarding resources and emails
Once you’ve begun using Sunsama, you’ll get a brief email each day with advice and reminders during your trial period.
If at any point you have questions or need help, please reach out to us or refer to this help center for more information about various features. You can write to us directly using the support chat bubble in the bottom right corner of the app. We always respond to those messages within one business day.
Updated 3 months ago
